
In this article (2)
Yes. A project can contain as many plots as needed, at no extra cost.
When creating the project
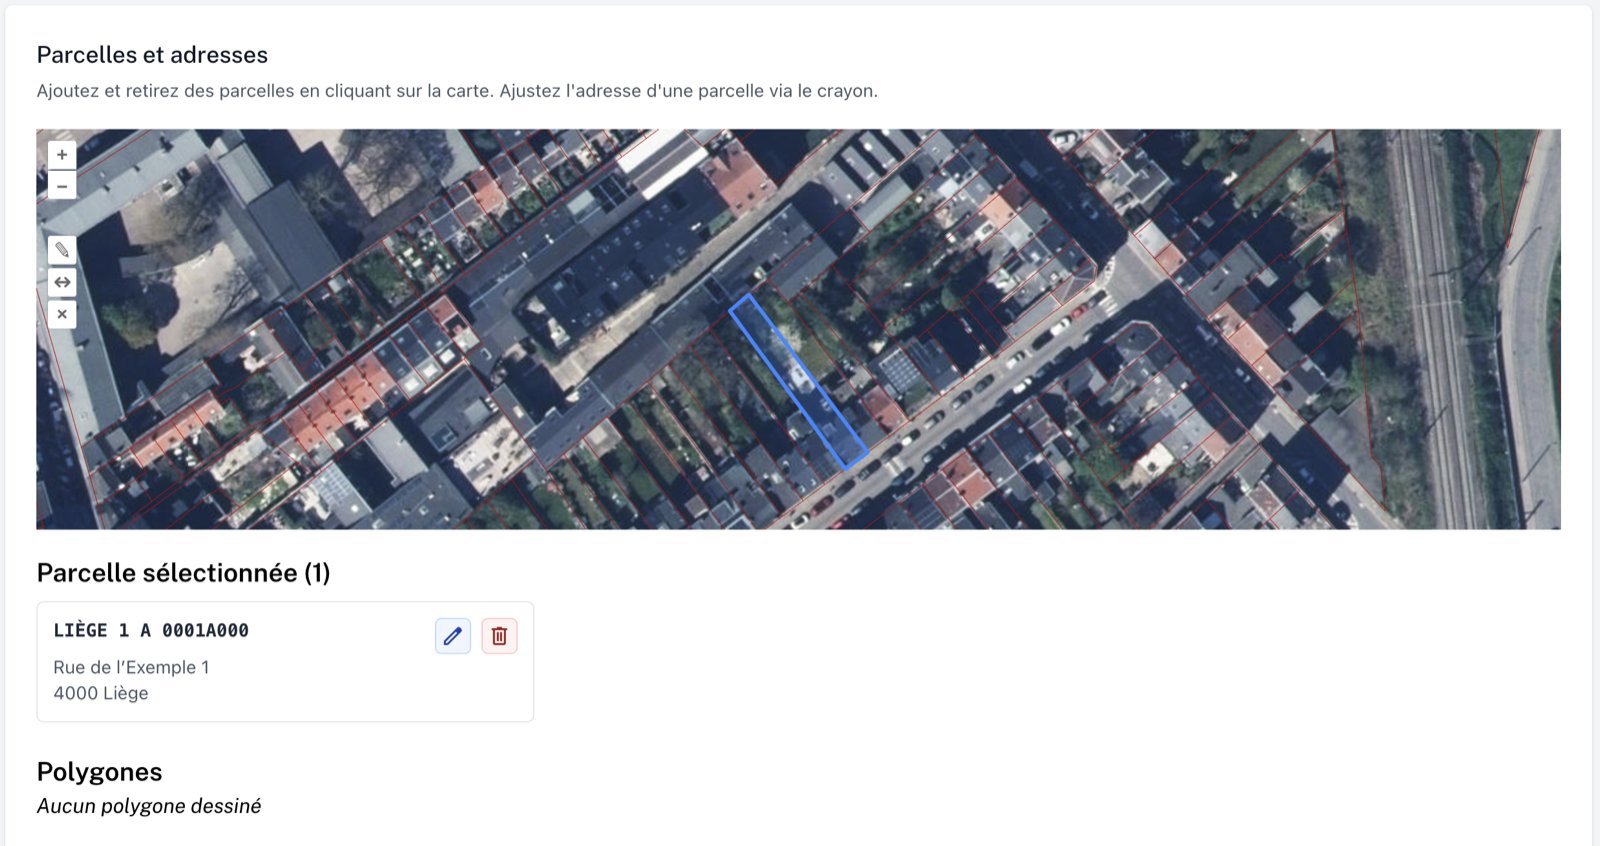
On the “Parcelles et adresses” (plots and addresses) screen, click on each plot of your project on the map. A selected plot turns blue and is added to the “Parcelles sélectionnées” (selected plots) list. Clicking it again on the map removes it. Each plot has its own address, which you can adjust with its pencil icon.
On an existing project
- Open your project page.
- In the “Parcelle sélectionnée” (selected plot) block, click the pencil icon. The “Parcelles et adresses” screen opens.
- Click on the map to add a plot (click it again to remove it).
- If needed, adjust a plot’s address with its pencil icon.
- Follow the next steps (proximity zone), then refresh the documents marked “Le document n’est pas à jour” (the document is not up to date).
💡 To remove a plot, you can also click its bin icon in “Parcelles sélectionnées”.